Camera & Drone Gear Blog
Info, Reviews, Comparisons, & News
Godox V860II Flash vs. Godox V1 (A.K.A. Flashpoint Zoom Li-on X R2) Comparison
A look at the differences between the Godox V1 and the Godox V860II, with a brief look at the Godox AK-R1 Accessory Kit for Round Flash Head.
(And a brief look at the Godox AK-R1 Accessory Kit for H200R Round Head)
See Also: What Equipment Do I Use? Taking a Look at Lights
When you are deciding what speedlight to buy, it’s extremely helpful to see some of your options in action. This post takes a look at the Godox V860II (same as the Flashpoint Zoom Li-on R2 sold by Adorama) and the more recently released Godox V1 (same as the Flashpoint Zoom Li-on X R2 sold by Adorama). At the time of this writing, the Godox V1 sells for $259 (has TTL & there is no cheaper manual-only version) while the V860II TTL sells for $179, or $139 for the manual-only version (the manual version is called the V850II and the TTL version is called the V860II). So what’s the difference between the V1 and the V860II?
(Note: This page contains links to products, so if you find this site useful and use a link to make a purchase, I’ll get a small commission. As an Amazon Associate I earn from qualifying purchases. Enjoy!)
Here are some of the more important specs for comparison purposes (click on the titles at the top to see similarities & differences):
After looking at the specs for these two lights, the item that stands out most to me is full power flashes per charge. It’s fascinating that the older V860II gets 650 full-power flashes on a 2000mAh battery, and the new V1 gets 480 full-power flashes on a 2600 mAh battery. This means that the V1 uses more power per flash, which is probably related to the fact that the head is bigger, and they designed it to produce a wide and smooth light with a gradual falloff.
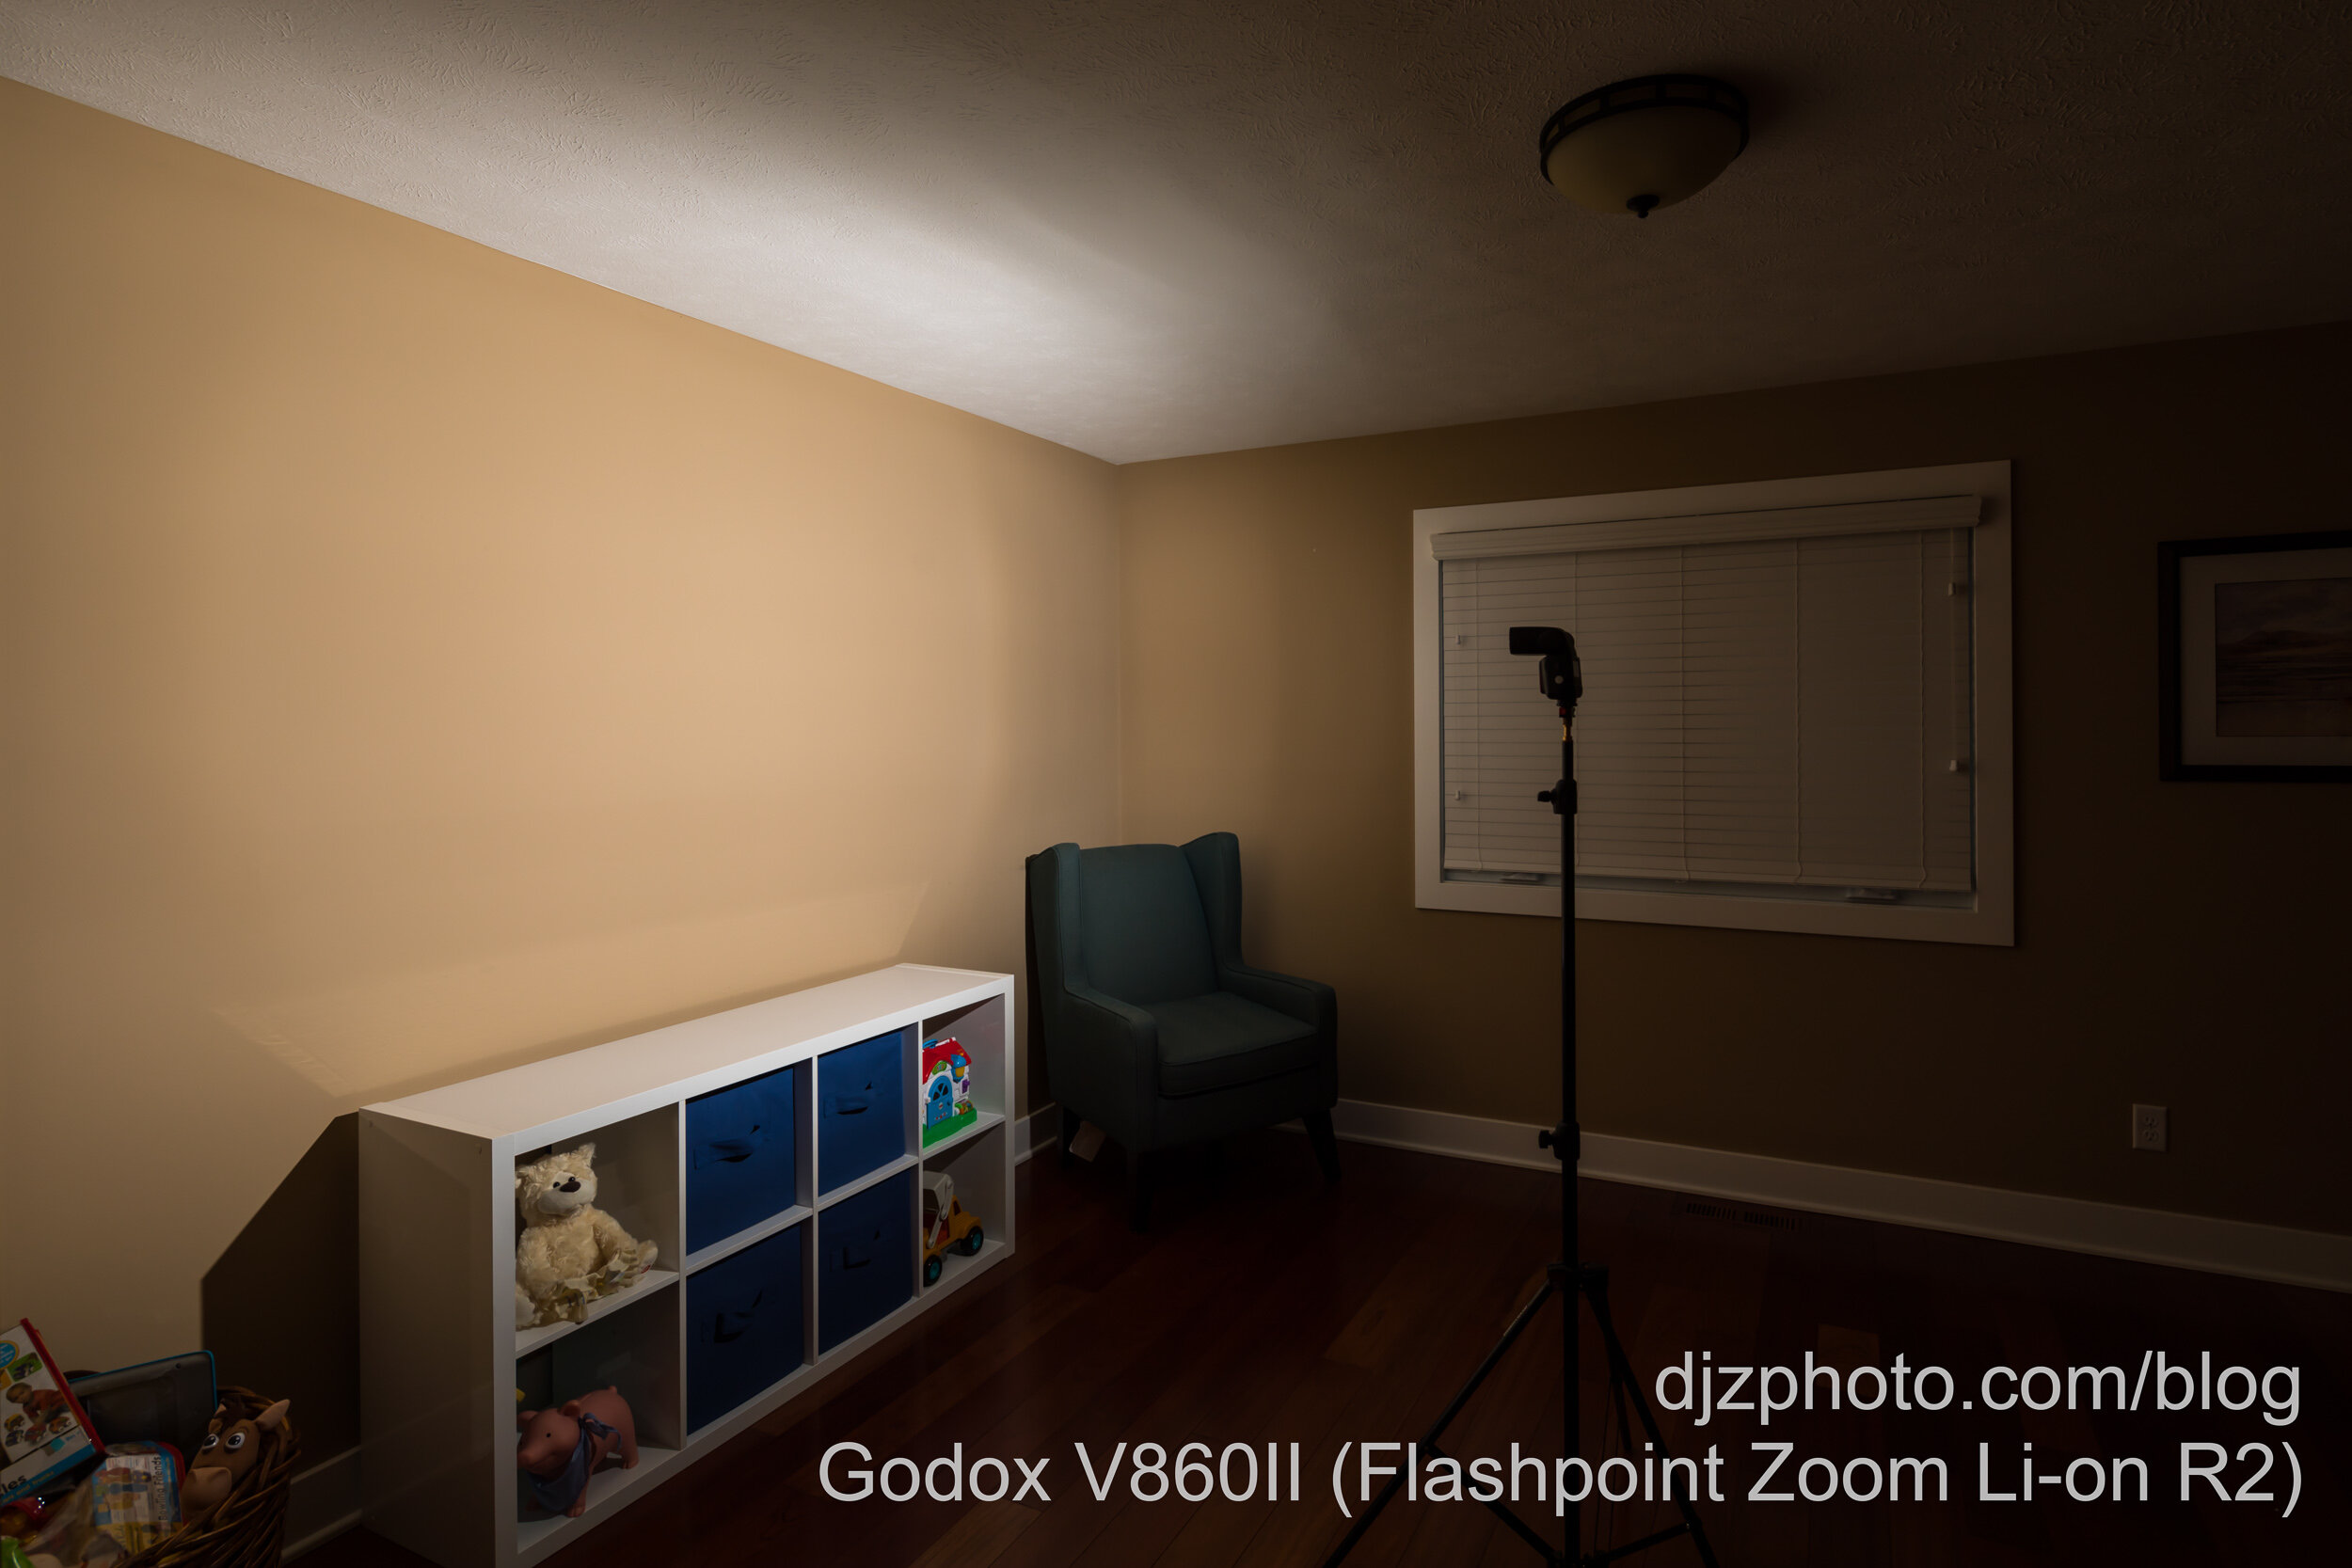
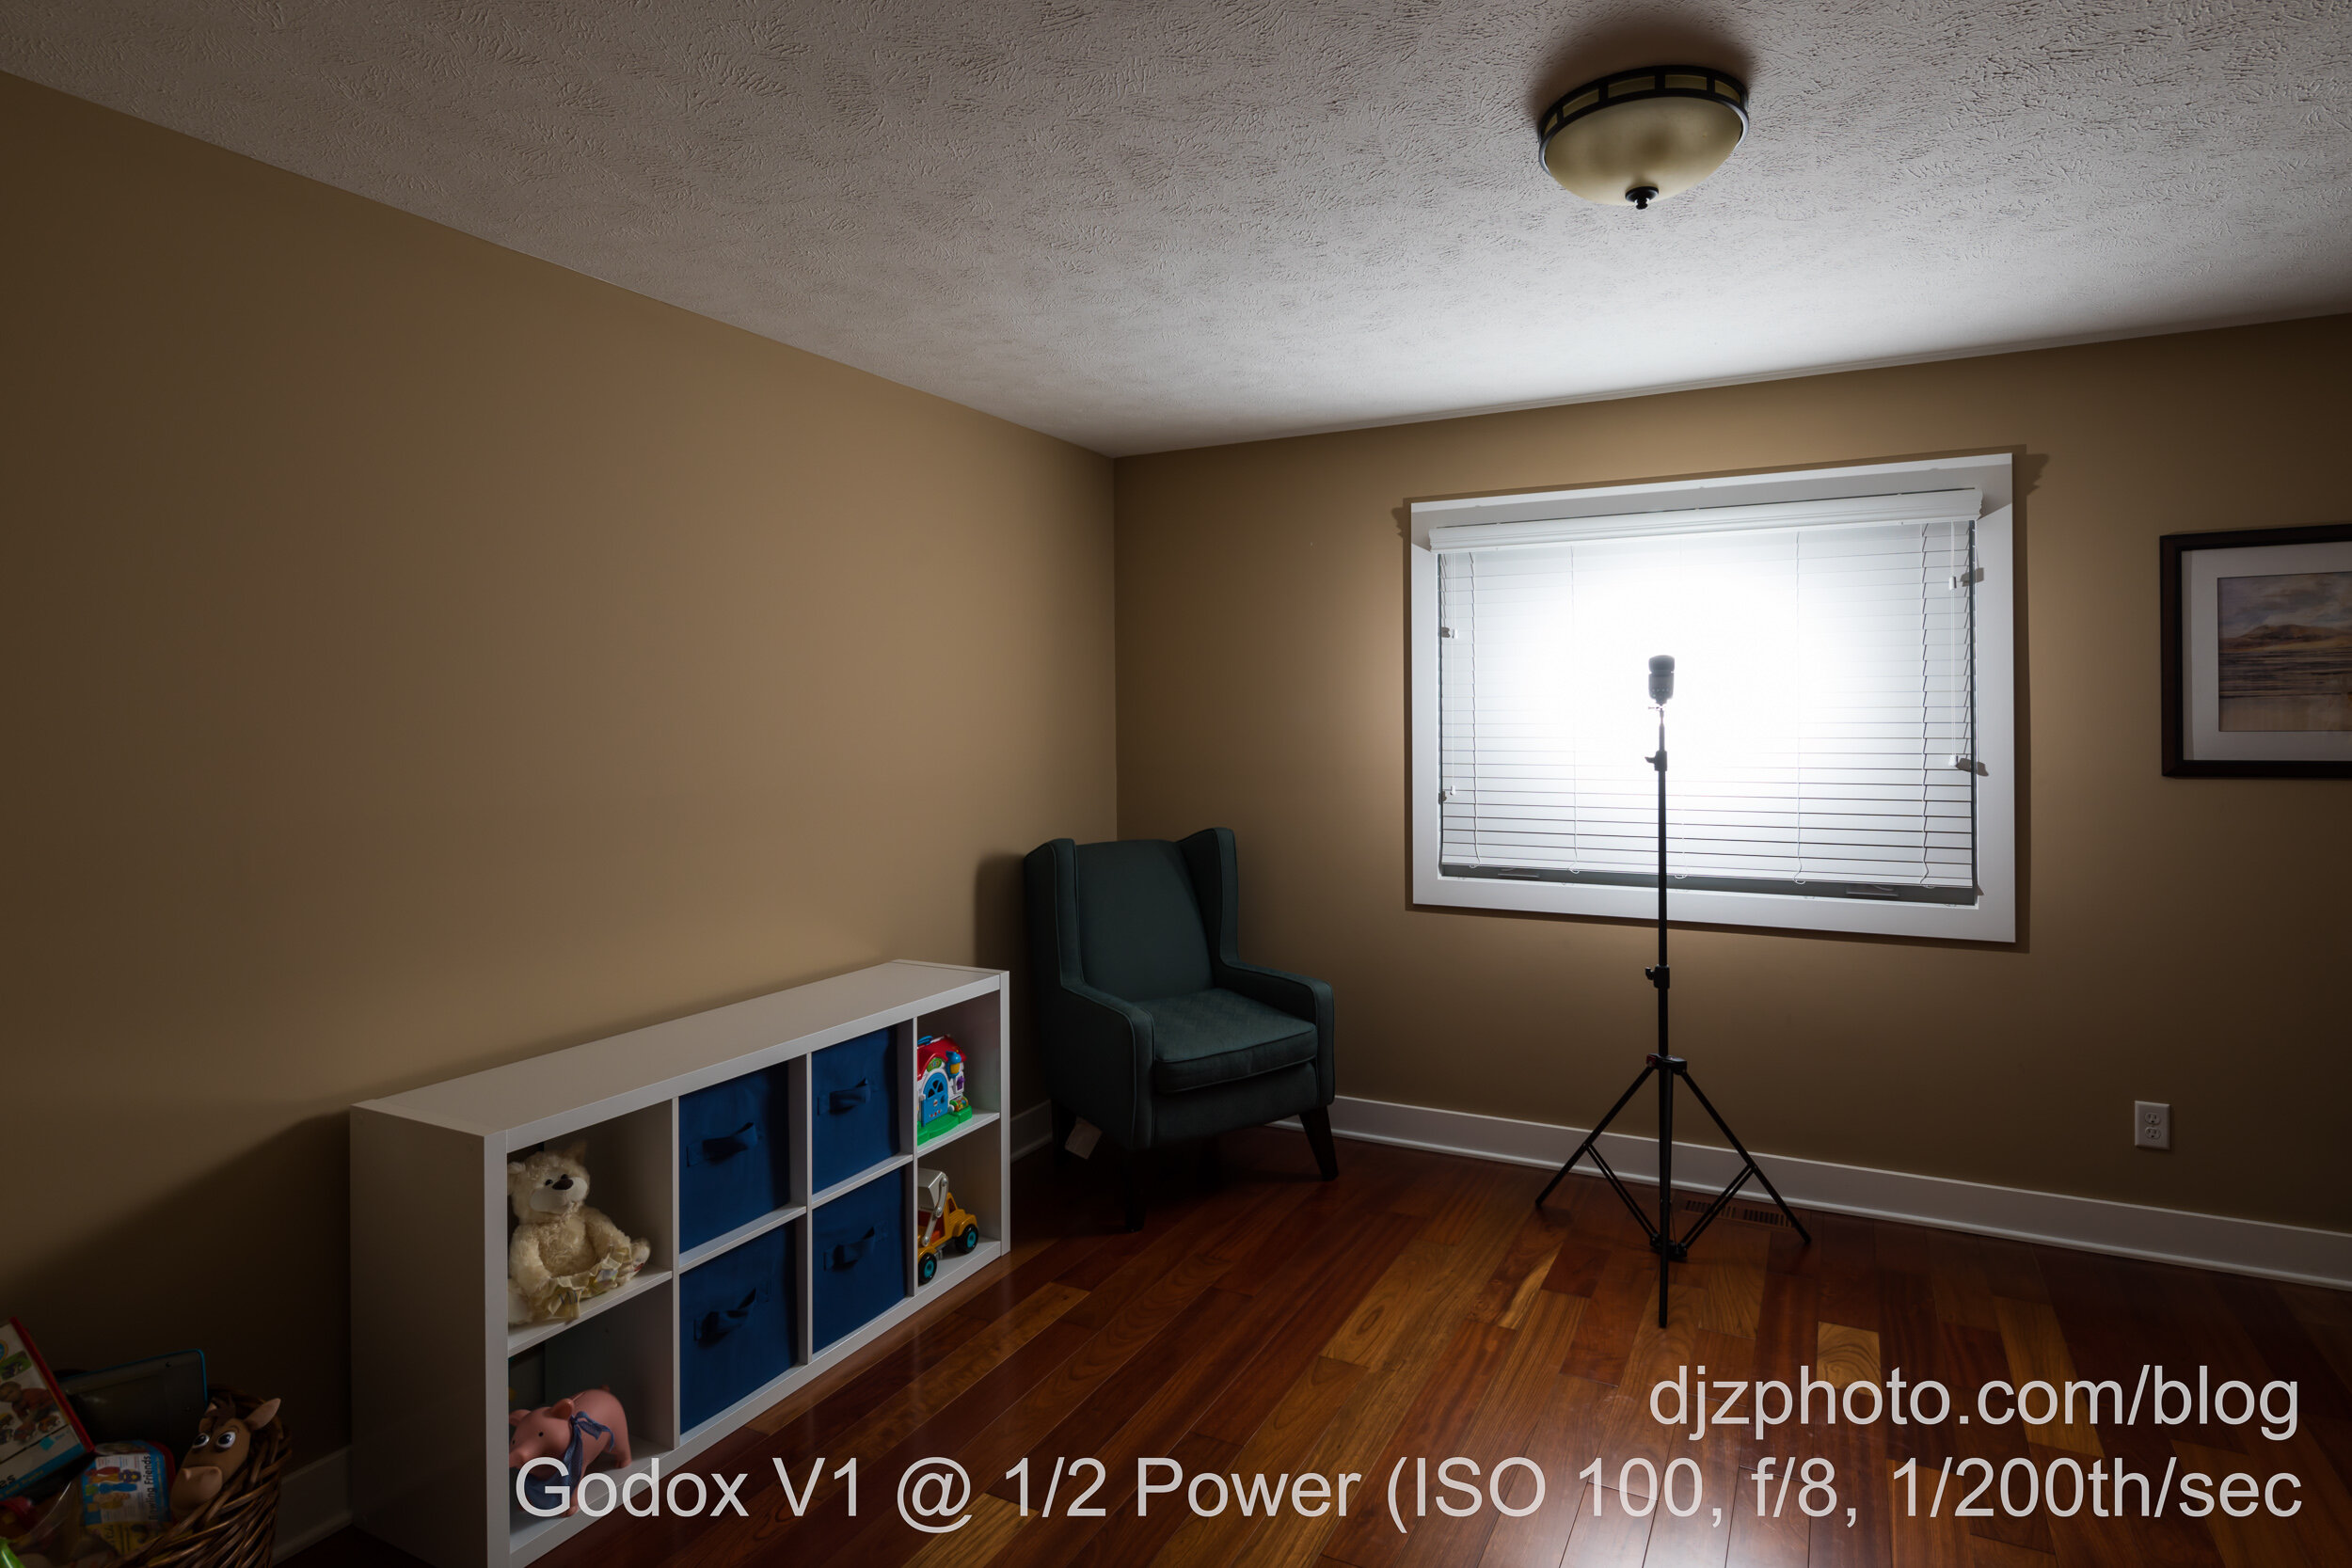
I wanted to compare the light output of the flashes in two ways: brightness and balance. Let’s take a look at balance first.
As you can see in the images above, the Godox V1 has a smooth & gradual light fall off, with no lines and without contrasting bright and dark areas. The Godox V860II clearly shows the pattern of the fresnel head, with a large bright circle in the middle, and then sudden and contrasting waves of uneven light. This is not important if you are using light modifiers or bouncing off walls, but if you plan on using direct flash without a softbox, umbrella, or omnidirectional dome diffuser, then this can become a consideration. It is also important to remember that if you add a light modifier like a softbox, you will be reducing the brightness of the light dramatically.
Next, let’s compare brightness.
When bouncing off a white object like these white blinds, the brightness of the Godox V860II and Godox V1 are very similar. It seems that the V860II is less than 0.3 of a stop brighter, so if you are using umbrellas, reflectors, or walls for bouncing light, you probably won’t notice much difference between the two.
It’s All About the Round Head
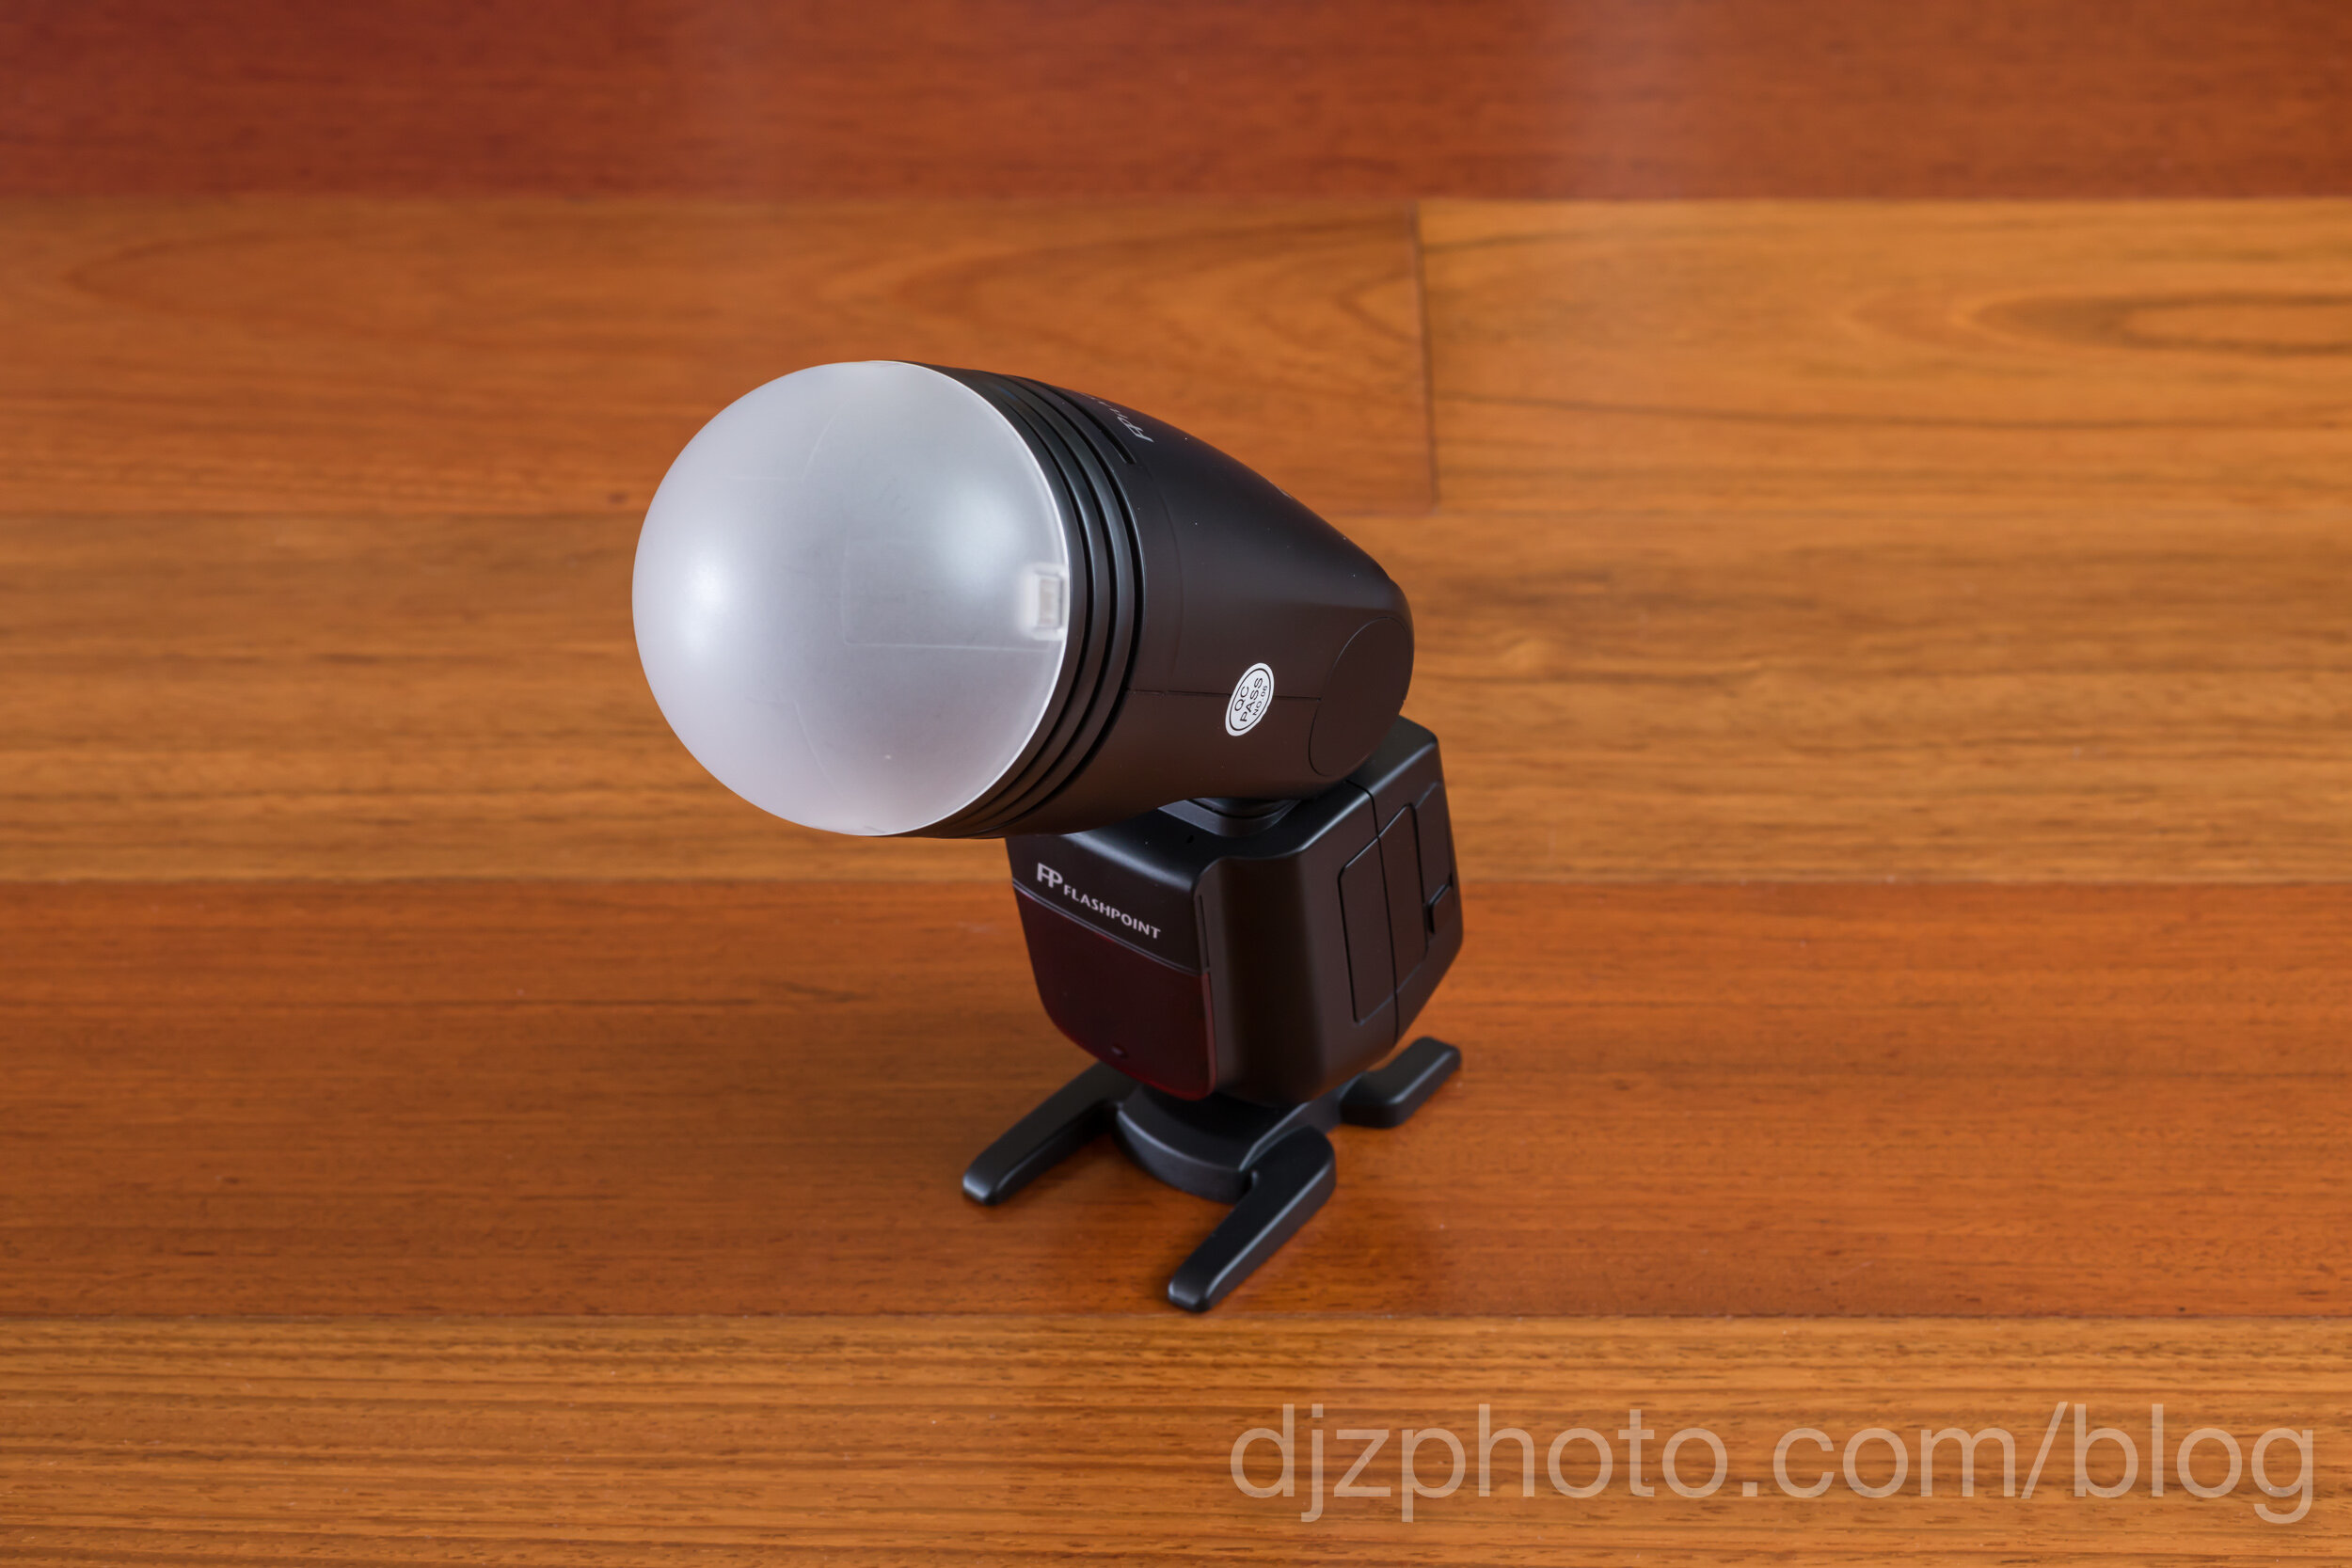
The difference between the Godox V1 and the Godox V860II all comes down to that round head. Besides having a smoother & more balanced light output, the round head also makes it possible to use the Godox AK-R1 Accessory Kit for Round Flash Head. It’s a magnetic ring system that makes the various accessories super quick and easy to mount or even stack. It comes with a few color filters, a grid, a snoot, a bounce card, barn doors, and an omnidirectional dome diffuser.
Having used both lights quite extensively for architectural interiors (along with a few other Godox lights), I have found the magnetic system to be very convenient and even time-saving. With the Godox V860II, if I wanted to use a grid, color filter, or go omnidirectional, I would use little velcro straps to attach things that wouldn’t sit perfectly flush or straight. I often had light leaking out the sides of color filters, then I’d fiddle around with them over and over. With the magnetic ring system on the Godox V1, the grids, filters and dome diffusers are super quick to attach and solid as a rock, with no light leak and no worries that you are going to bump them out of alignment. If you want additional filter colors, it’s easy to cut a circle from a color filter sheet, or even buy the Godox Color Effects Set for Round Flash Heads. The AK-R1 Round Head Accessory Kit also works with the AD200 H200R Round Head.
So, should you buy the Godox V1, or the cheaper Godox V860II? I think the answer is: it depends.
Buy that shiny new Godox V1 if:
you have traditional speedlight accessories and are sick of fiddling around with velcro or rubber straps
you don’t have a speedlight yet but want one with an accessory system that’s quick and easy to manage
you plan on using a lot of direct, unmodified flash
the round head accessory kit looks sweet
Save money and get the Godox V860II if:
you never use small modifiers
you only bounce off walls, umbrellas, and other reflectors
you never use direct, unmodified flash
you already have a bunch of traditional speedlight accessories and modifiers that you like
I hope this article helps clarify the main differences between these two lights. The V860II is definitely not being replaced by the V1… it is still a great cost-effective option to consider for many people looking at purchasing a new speedlight.
Below are some of the products mentioned in this article:
Accessories & Modifiers for traditional speedlights:
The Many Faces of the Godox AD200 (AKA Flashpoint eVOLV 200)
I previously wrote a post about the different lights that I use, and that article touched on the AD200 options briefly… but I wanted to look more specifically at some of the available AD200 accessories and how they affect the spread of light from the AD200 with it’s three different heads. Documenting these tests with images will help me know which heads and modifiers are best in various situations, and hopefully it will help others as well. Maybe you won’t have to buy as many accessories as I did!
The Godox AD200 has become quite popular since it’s 2017 release. It is much brighter than a speedlight, but not much bigger. There’s many ways for your Godox AD200 to shine: It’s fresnel, bare bulb, and round heads each have accessories available for shaping light in different ways. Since purchasing a couple of AD200’s in 2017 I’ve used all three heads (you typically have to buy the round head separately) and somehow managed to accumulate copious AD200 accessories. I can’t help it… they just keep making more!
I previously wrote a post about the different lights that I use, and that article touched on the AD200 options briefly… but I wanted to look more specifically at some of the available AD200 accessories and how they affect the spread of light from the AD200 with it’s three different heads. Documenting these tests with images will help me know which heads and modifiers are best in various situations, and hopefully it will help others as well. Maybe you won’t have to buy as many accessories as I did!
This page contains links to products, so if you find this site useful and use a link to make a purchase, I’ll get a small commission. As an Amazon Associate I earn from qualifying purchases. Thanks!
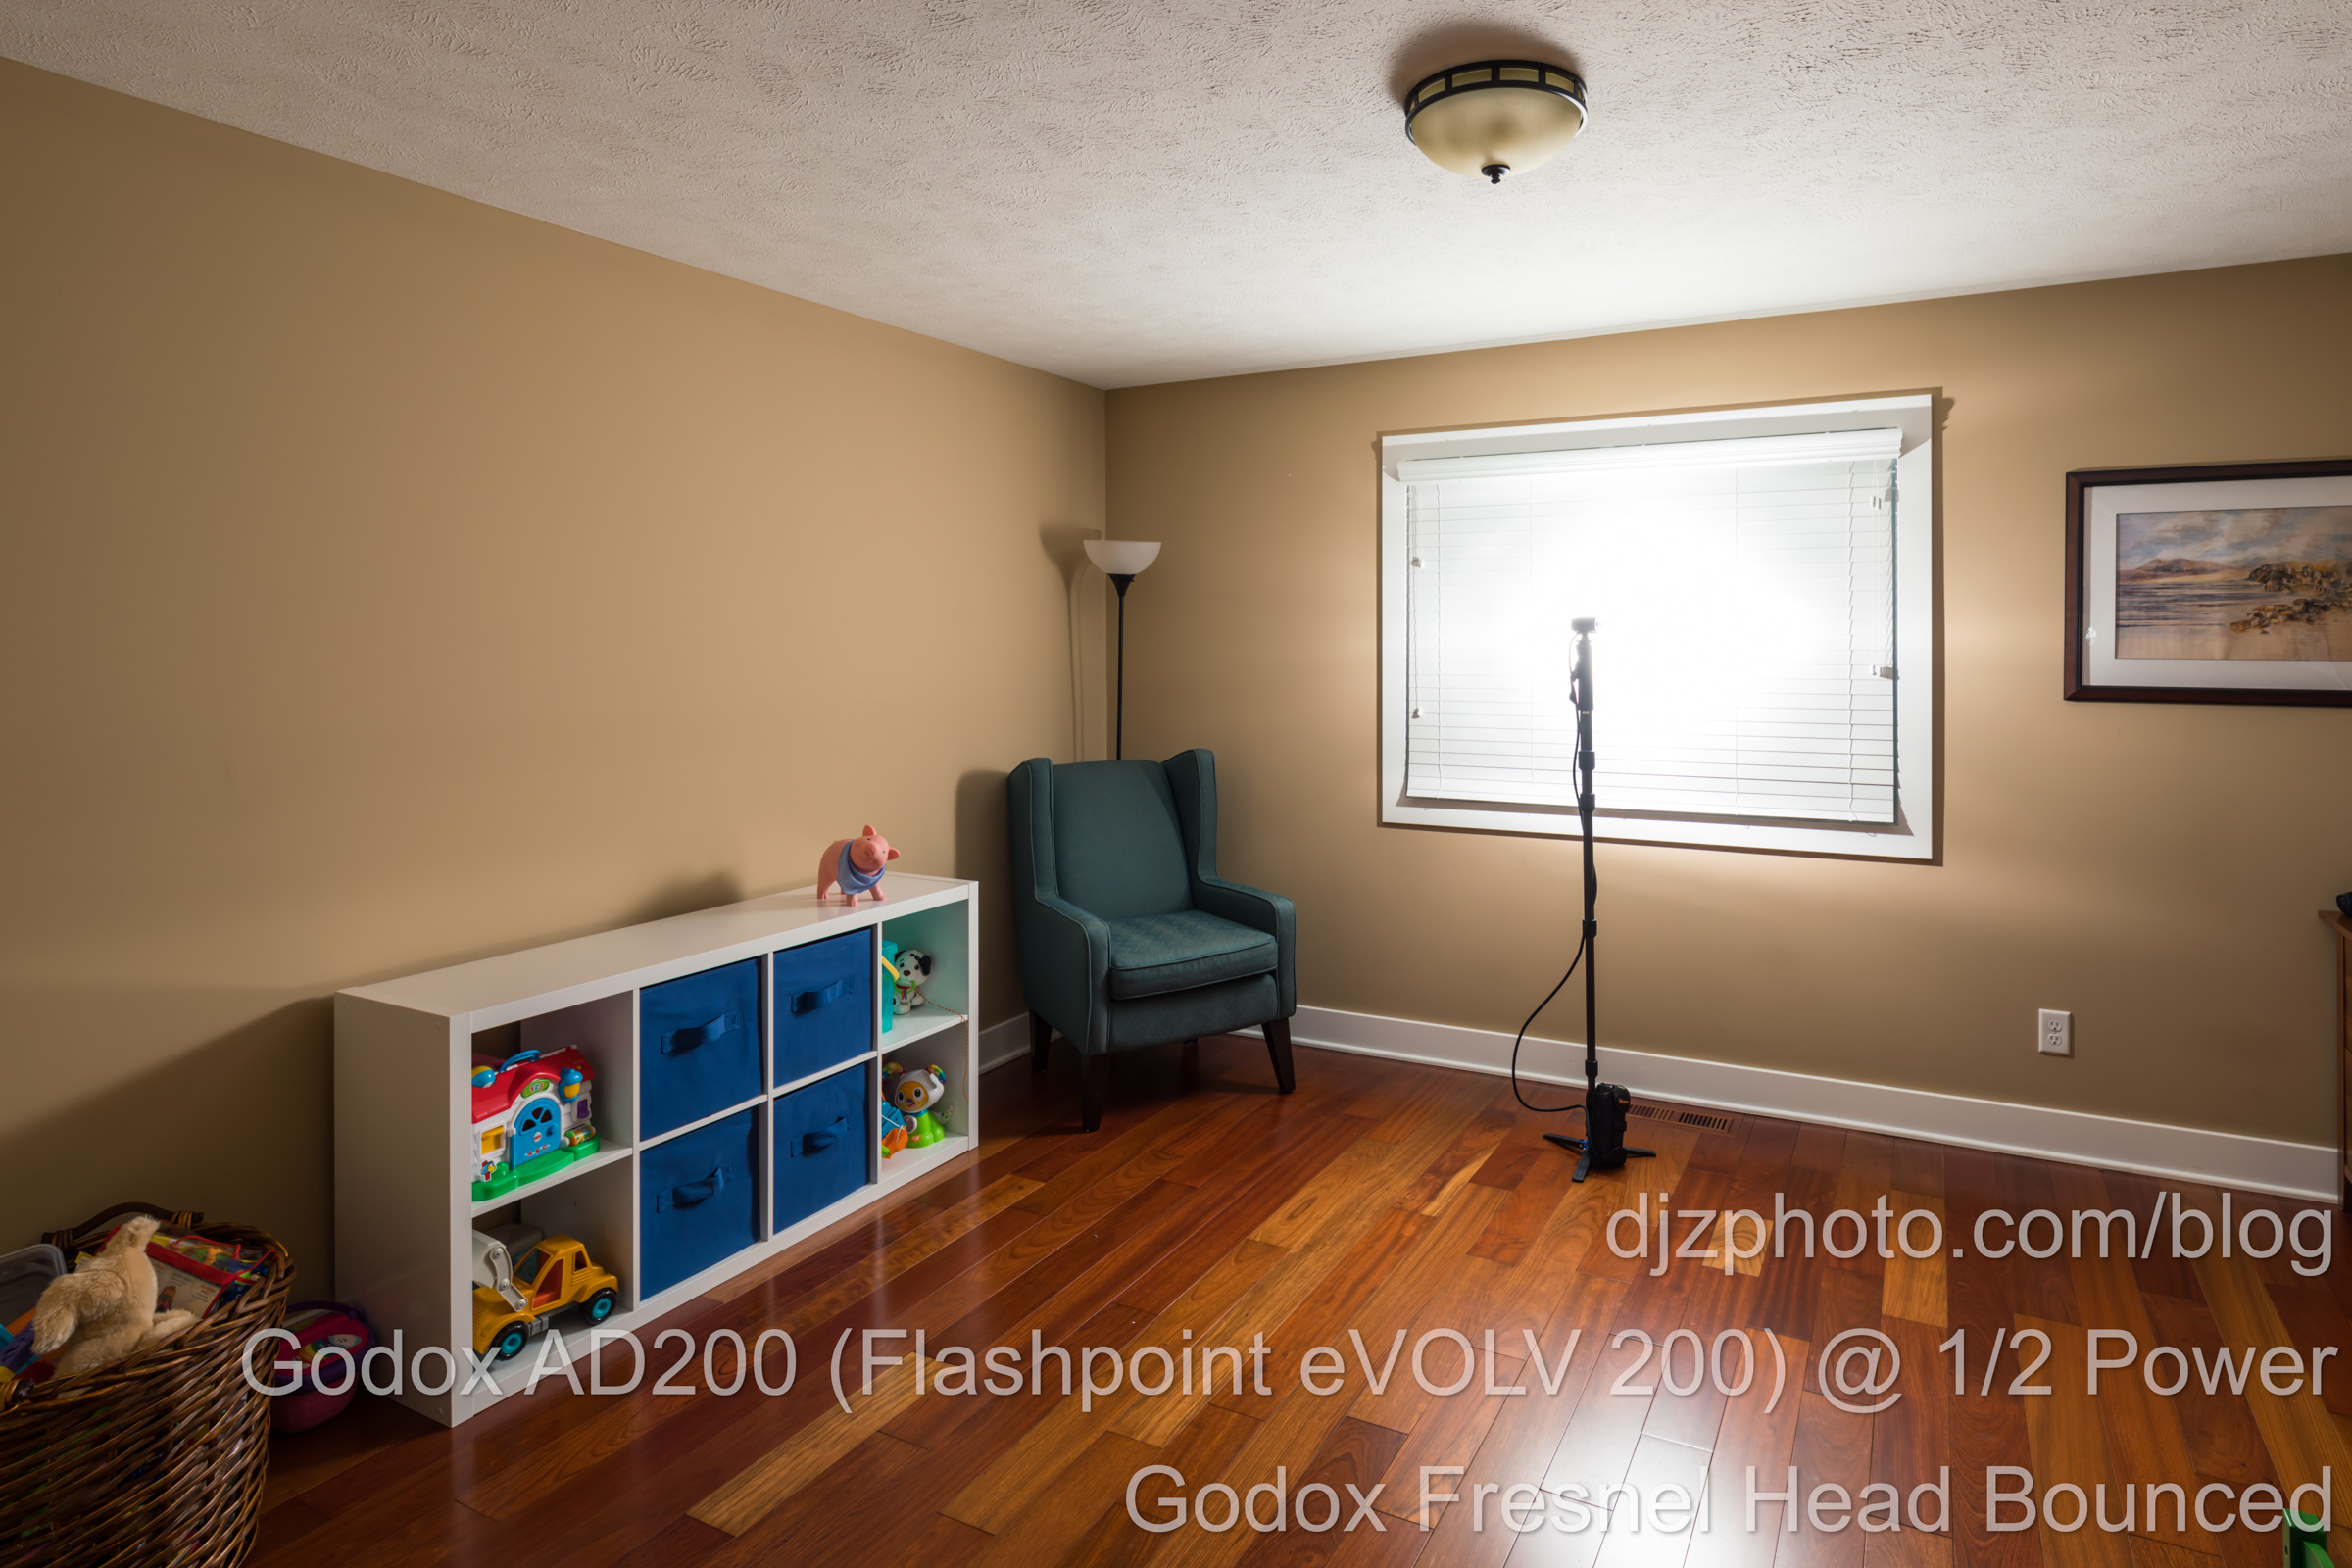
For each of these images, I used the same setup & settings: ISO 100, f/8, 1/200 shutter speed. The AD200 stays in the same spot, as does the camera. The AD200 is sitting on a Benro MACH3 Series 4 Carbon Fiber Monopod with a Benro 3-Leg Locking Base (see my note on that near the bottom) with an extension head. One thing I’ll say about this setup is if you put your AD200 on a monopod, make sure the base is tight and don’t knock it over. =)
This first gallery shows the various heads and the differing light spreads they produce, all at 1/8th power:
The second gallery shows how bright the various heads are when bouncing off a white surface from a distance of 20 inches at 1/2 power…in this case, the blinds:
Thoughts & Observations
Fresnel Head
The fresnel head light spread is rather narrow, uneven, and has undesirable light leaks coming out at extreme side angles. If you use it in an umbrella, the narrow beam at close distance isn’t going fill it evenly, and you might have light rays spraying out sideways. The only positives of the fresnel head (in my opinion) is that it is slightly brighter when bouncing off walls and/or ceilings, and it is the most compact head when packing gear into small cases. You can resolve the sideways light-leak issues if you put a speed strap around the fresnel head as if you’re going to velcro some gel to it, and then slide it up a bit so the edges of the speed strap come out past the end of the AD200.
Pros:
- Is the brightest head for the AD200
- Is the most compact head for the AD200
- Is included with the AD200 basic package
- Will work with standard speedlight modifiers
Cons:
- Has the worst light spread of the available heads for direct flash
- Light escapes out the sides at extreme angles
H200R Round Head
The H200R Round Head has a very wide and even light spread, but is not quite as bright as the Fresnel or Bulb heads. Much of the appeal of the Round Head is that there is a nice magnetic accessory kit available (which I don’t have yet, since it is an additional cost), and it will work very nicely for direct flash. But you have to keep in mind that once you start adding the magnetic modifiers the light will be diminished even more. The magnetic modifier set doesn’t have a ton of different gel colors, but you could cut some generic gel sheets into circles and attach your custom gels to the round head using one of the included magnetic rings (I haven’t tried this yet). Godox does have plans to release a round head speedlight that will also work with the round head accessory kit. The H200R head also can be used as a flashlight with its modeling light feature. There wouldn’t be an advantage compared to the other heads when using the round head to bounce light off walls or umbrellas, since it is not as bright as the fresnel or the bare bulb heads, and bouncing light negates the importance of the super even light spread. I likely will use this head for outdoor twilight or night photography because of its light spread quality and flashlight capabilities.
Pros:
- Has the most even light spread of available heads
- Can be used as a flashlight with the modeling light feature
- Is easier to pack than the bulb head
- Has a nice set of magnetic modifiers available
Cons:
- Not as bright as the bulb or fresnel heads
- Not included with the basic AD200 package
- Magnetic modifier set also has to be purchased separately
Bulb Head
The Bulb Head is what I normally use because it has a nice variety of reflectors and accessories, has a fairly even light spread if I end up using direct flash, and is brighter than the round head. It also works great with umbrellas using the AD-S6 Umbrella Reflector. One downside– it is the bulkiest head option for the AD200 when packing if you leave any of the reflectors or diffusers attached. I was pleased with how smooth and omni-directional the dome diffuser was, although it looks a little blue in color temperature (all the images above were processed with the same white balance), so keep that in mind if you are mixing that with other types of heads or modifiers. Maybe a little CTS 1/8 inside the dome would bring it closer to the other reflectors, but I haven’t tried that yet so I’m not sure.
I have two AD200’s that I use at every shoot with the bulb heads and umbrella or standard reflectors attached, mostly for wall and ceiling bounces. This is great in most scenarios, but if the walls and ceilings are stained wood or bold paint colors, I’ll use things like umbrellas, beauty dishes, and dome diffusers rather than ceiling or wall bounces. The beauty dish is useful if you need it outdoors and are concerned about wind knocking over an umbrella, or if you want to fit into smaller spaces than an umbrella.
Pros:
- Has a variety of low-cost accessories and reflectors than can be easily attached
- Light spread is pretty even regardless of which accessory is being used
- Works great with umbrellas (using the umbrella reflector)
- Is included with the basic AD200 package
Cons:
- Bulkiest head when packing into a case regardless of which reflector is attached
- The other heads are easier to gel
- Reflectors must be purchased separately, but don’t cost very much
Using the AD200 on a Monopod with a Base
Disclaimer: If done properly, it is quite stable… but I take no responsibility if you knock over your monopod or damage something. =)
There have been many times at past photoshoots where I would be in a house and think to myself, “man, a monopod with a base would be perfect for this spot here!” I would want to put light stand behind the bathtub by the window, or hide a light stand in a shower, or put one on the dining room table, but not be able to due to the footprint of the legs of my normal light stands. Finally I bought a monopod, and I must say, it is very handy. I used to use cheap camera tripods as light stands for situations like this, but a monopod can double as a hand-held light that can be extended over objects if I want some overhead lighting– i.e. a “light on a stick.” It also is easier to carry around than a full-sized light stand or tripod because the legs aren’t clunking around, and by using the extension head, I can keep the heaviest part of the light at the center of the base for stability. The feet of the monopod are also softer and bigger than tripod or light stand feet, so they are less likely to damage things. Having the feet as one solid unit is also very nice because they don’t slide around.
You could probably find cheaper monopods with bases for this use, but I got a decent one because I’ll probably also use it as an actual monopod for my DSLR as well. I put the AD200 in a pouch that attaches to the bottom section of the monopod, then run an extension head up to the top, where I have the bulb head with a reflector. The extension head is nice because the top has screw threads for attaching to light stands, tripods, or monopods, and can be rotated (without unscrewing) and tilted. This setup is less top-heavy and more stable than a speedlight on a monopod would be. My setup is the following:
Benro MACH3 Series 4 Carbon Fiber Monopod (MMA49C)
Benro 3-Leg Locking Base
Flashpoint Pouch for eVOLV 200 Pocket Flash
Flashpoint XP-200 V2 Portable 200ws Extension FlashHead
I leave it assembled and keep it in a cheap tripod bag.
Below are a few example photos where the monopod was used in places I wouldn’t have been able to hide or even place a full sized light stand:
I typically setup five lights at photoshoot locations, and use 1 to 5 lights to produce each image depending on the complexity of the shot. I certainly wouldn’t put all my lights on monopods (most of them are on normal light stands), but it has been incredibly handy to have something that works both as a small footprint, freestanding light stand and also a handheld light on a stick. Now that I’ve gotten used to it, I wish I had done it sooner!
If you’re looking for a speedlight on a stick solution that is cheap but doesn’t stand up on its own, just get a painter’s pole or broomstick, painter’s pole adapter, and a cold shoe.
The Heads & Accessories
Below are links to the heads and accessories mentioned in this post. The Godox and Flashpoint version are the same product, but if it says “Flashpoint” you would get a warranty from U.S. based Adorama Camera, and if it says Godox you would be dealing with Godox for technical issues if they arise.
Godox Wistro AD200 / Flashpoint eVOLV 200 (comes with the bulb head and fresnel head)
Godox Round Head H200R
Godox AK-R1 AD200 Round Head Accessories Kit for Godox H200R / Flashpoint eVOLV 200 Round Head Accessory Kit AK-R1
Flashpoint Bundle - H200R Round Head bundled with eVOLV 200 AK-R1 Round Head Accessory Kit
Godox AD-S2 Standard Reflector with Soft Diffuser (for bulb head)
Godox AD-S6 Portable Umbrella-type Reflector (for bulb head)
Godox AD-S3 Beauty Dish Reflector with Honeycomb Cover (for bulb head)
Godox AD-S17 Dome/Wide Angle Soft Focus Shade Diffuser (for bulb head)
Godox Extension Head for AD200 / Flashpoint Extension Head for eVOLV 200
If you want a grip for the AD200 that doubles as a mini freestanding light stand (works as a camera grip & tripod too), this looks pretty cool:


