
DJI Mavic 3 vs. DJI Air 2S - Image Quality Tests, Comparison and Review
Is the Mavic 3 the best drone camera from DJI short of buying an Inspire 2? I tested it out in a few locations and compared it to the DJI Air 2S.
This page contains links to products, so if you find this site useful and use a link to make a purchase, I’ll get a small commission. As an Amazon Associate I earn from qualifying purchases. Enjoy!

Well it’s finally here… the DJI Mavic 3! This announcement was exciting (if you’re a camera nerd like me) because it is the first time I’m aware of that we have a compact, foldable drone with a 4/3 sensor (17.3mm x 13mm). This size sensor was previously only available on a Zenmuse X5, which requires an Inspire to use. Ever since the Phantom 4 Pro was released in 2016 any drones smaller than an Inspire maxed out with a 1” sensor (13.2mm x 8.8mm).
Having a larger sensor should mean less noise and more detail. So naturally I wondered… does the new DJI Mavic 3 beat my previous compact favorite, the DJI Air 2S?
Before we dive into image quality tests vs. the DJI Air 2S (a.k.a. Mavic Air 2S), let’s take a look at how the specs compare.
DJI Mavic 3 vs. DJI Air 2S - Specs
Mavic Air 2S
1” 20MP Sensor (3x2 Ratio)
22mm Focal Length
5472×3648 Photo Resolution
5472×3078 @ 24/25/30 fps Video
Fixed f/2.8 Aperture
Weight = 595g
Flight Time = ~30 Minutes
Wind Resistance = ~24mph
Mavic 3
4/3 20MP Sensor (4x3 Ratio)
24mm Focal Length
5280×3956 Photo Resolution
5120×2700 @ 24/25/30/48/50 fps Video
f/2.8 - f/11 Adjustable Aperture
Weight = 895g
Flight Time = ~45 Minutes
Wind Resistance = ~27mph
Besides having a larger sensor, the other interesting thing about the Mavic 3 is that it features a gimbal with TWO cameras. The telephoto camera not mentioned in the specs above is a smaller sensor with a lower resolution that only produces JPG’s, so I will go over that camera with samples after I compare the Mavic 3’s main camera to the DJI Air 2S.
PLEASE NOTE: I am overly meticulous about image quality and I think both of these drones are great for a variety of purposes. I am going to be nitpicking slight differences in image quality just because it’s interesting (to me anyway!) to see how different sensors can affect the details of your photos.
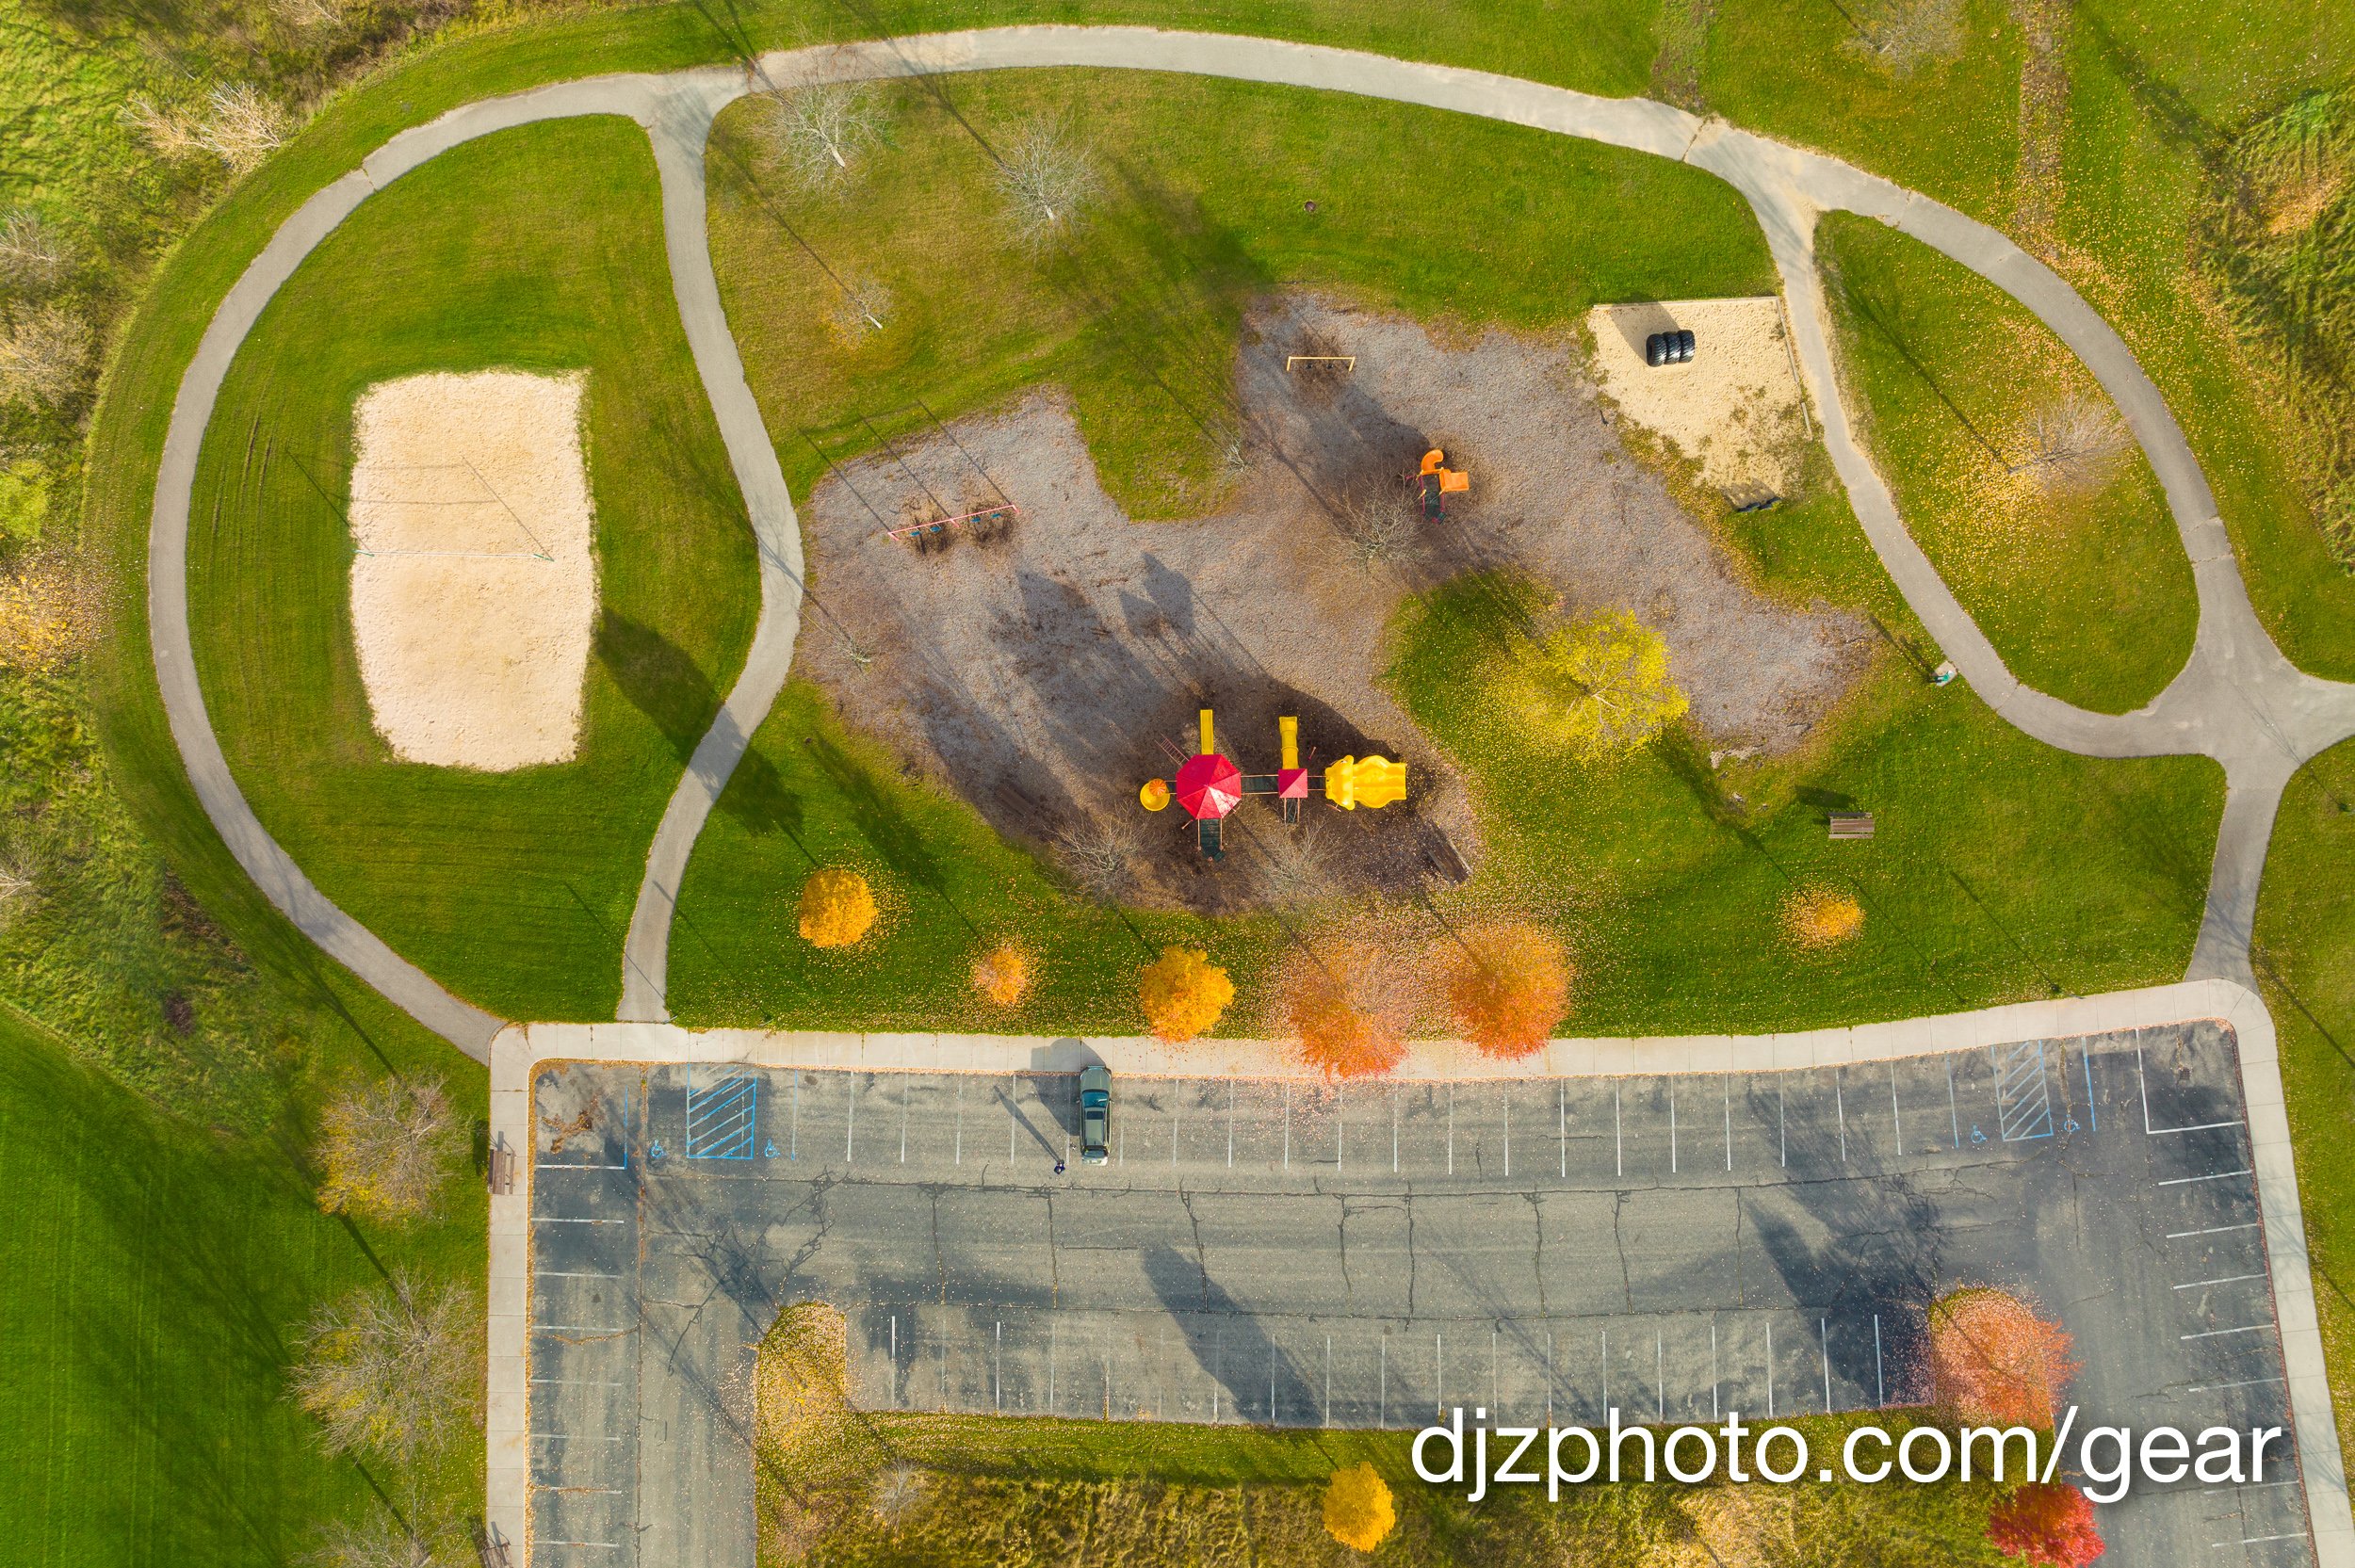
The first scene we will take a look at was a top down view of a park in the fall. Since the DJI Air 2S is 22mm and the Mavic 3 is 24mm, the Mavic 3 was at 300ft and the DJI Air 2S was at 275ft when these photos were taken in an attempt to make the comparison more similar. A perfect comparison was also difficult since the Mavic 3 is a 4:3 ratio camera and the Air 2S is 3:2 ratio.
Here are the overall images with no adjustments and default sharpening in Adobe Lightroom:

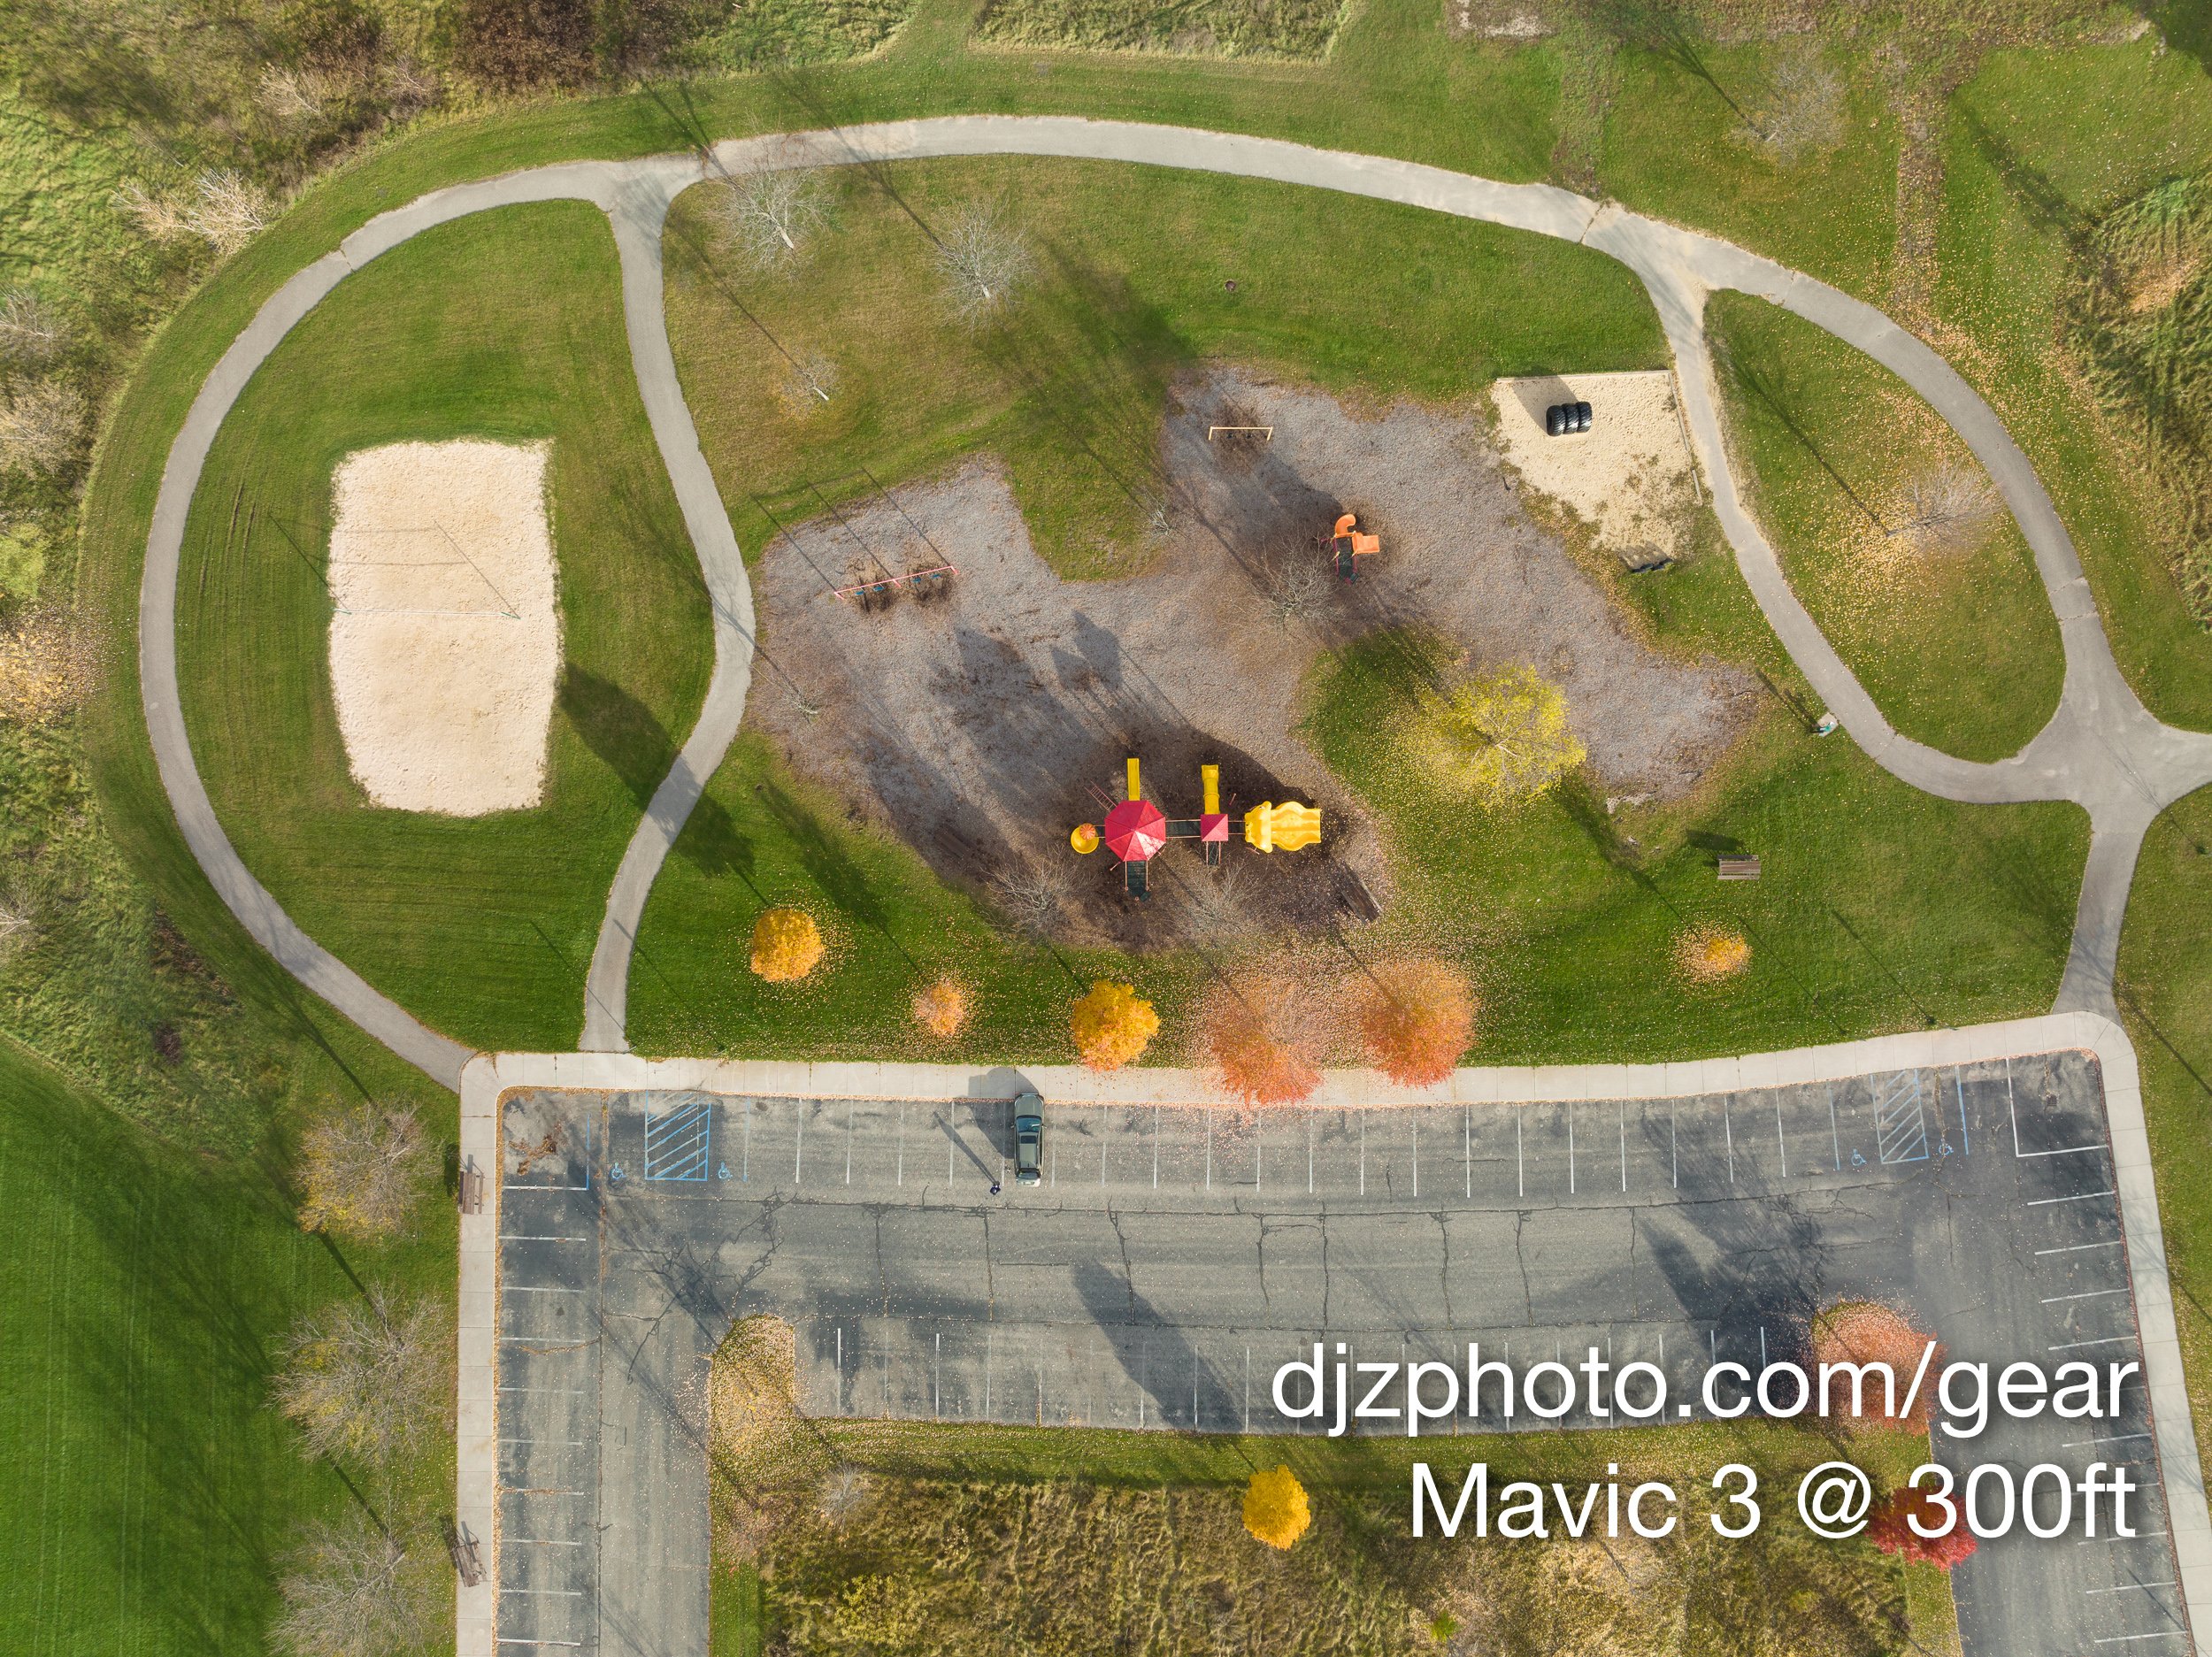
Looking at the above images you can see there is a bit of difference in color with no Lightroom adjustments and the white balance set to the default “daylight” settings. The DJI Air 2S seems a little on the red side, and there also seems to be more color in the Mavic 3 image straight out of the camera.
Let’s zoom in and compare some specific areas of the photos:


You can again see the color difference with these adjustment-free images. One of the things DJI promotes with the Mavic 3 is the “Hasselblad Natural Colour Solution” as a reason to consider paying the extra cost vs. the DJI Air 2S, and it looks like the Hasselblad sensor causes the color to “pop” a bit more. In the Mavic 3 image the red roofs are a cooler red and the ground is a warmer brown, which creates more color contrast for a more vibrant photo. The image from the DJI Air 2S seems a little bit more “drab” right out of the camera. You can certainly make colorful, compelling images with the Air 2S, but the Mavic 3 might have DNG files that start out with a slight advantage.
Even though I prefer the color of the Mavic 3, the DJI Air 2S definitely has a very sharp lens at the center and I’m impressed it was able to keep up with the larger camera on the Mavic 3 in the center of the frame. Both cameras are 20-megapixel and there’s not really much difference in detail.
Let’s see what happens if we venture a little farther away from the center of the lens:


In the above images we can start to see some differences in sharpness. When you look at this tree towards the edge of the frame you can see the photos taken at f/2.8 with both the Mavic 3 and DJI Air 2S are quite a bit softer than the Mavic 3 photo taken at f/5.6. The DJI Air 2S is always at f/2.8 because its aperture is not adjustable, whereas the Mavic 3 has an adjustable aperture. If you are taking photos in the daytime with the Mavic 3, you will almost always want to stop down and avoid using f/2.8 so you can maximize the edge to edge sharpness.
You can again see better color separation with the Mavic 3 over the DJI Air 2S. The colors are more vibrant and varied with the Mavic 3 and the DJI Air 2S almost seems more monochromatic.
Another notable difference in the tree crops is the DJI Air 2S is noisier in the shadow of the tree than in the Mavic 3 photo.
Let’s take a look at a scene with a lake. I tried to make these photos look fairly similar with global adjustment sliders in Adobe Lightroom, but an apples-to-apples comparison didn’t happen here because the sunlight was changing pretty quickly:


I took the above photos knowing the images would be different due to quickly changing lighting, but I wasn’t sure what differences I might find when I started looking closely on the computer. Let’s zoom in on some interesting differences I noticed in the shadows of the foreground:


Keep in mind that these are edited photos. I have saturation at +22 for the DJI Air 2S but just +18 for the Mavic 3. Looking at the above images, you can see the Mavic 3 managed to figure out all the various warm color variations of the leaves in the shadows and their color “pops” against the cooler green color of the grass. In the DJI Air 2S photo the leaves, grass, and trees all sort of blend together with a similar color. The Mavic 3 also managed to figure out the reddish-brown color in the edge of the woods under the trees on the left.
Let’s take a look at another area:


In the crops above it is apparent that there’s quite a bit more noise in the DJI Air 2S photo, which is a a close up of an area that was in the shadows. The Mavic 3 crop you can see individual waves on the water, but in the DJI Air 2S crop it’s a little too noisy to see the waves. You can also compare the brown-leaf tree on the right and the green tree on the left and see the Mavic 3 once again does better distinguishing the color differences of the brown and green leaves against the blue water. The DJI Air 2S crop (which is taken from towards the corner of the frame) is a bit softer than the Mavic 3 shot. The Mavic 3 shot is nice and sharp but shows a tiny bit of aberration on the white boat lift frame.
For my final test I took the drones indoors for a controlled test at ISO 1600 to see what the noise would look like. I used a chair with some crayons as a subject:


Both of these images are at f/2.8, ISO 1600, 1/8th shutter speed, with Vibrance & Saturation +/-0 in Adobe Lightroom. I did overcompensate the focal length difference and placed the Mavic 3 a little bit too far away (it was farther away than where the DJI Air 2S was placed), but we can still check out the noise difference when we zoom in on the crayons:


If you look at the top part of the wrapper of the yellow crayon, you can once again see the Mavic 3 creates better color separation with the orange mark on the yellow wrapper. The Mavic 3 sensor causes the orange mark to stand out as a different color than the wrapper, but the DJI Air 2S renders the orange mark as a similar color. You can also see that there is noticeably less noise on the red chair behind the crayons in the Mavic 3 crop vs. the DJI Air 2S crop.
Should you Buy the DJI Air 2S or the Mavic 3?
I have been using the DJI Air 2S extensively since it came out. It really is a great compact drone and the center of the lens is very sharp. There are a couple things I don’t like about it, however. The aperture is stuck at f/2.8, and if there’s one aperture setting I never imagined myself using to photograph sweeping landscapes it’s f/2.8 (haha)! Usually when I use my “big” camera to take landscape or architectural photos on a tripod I stay away from being “wide open” at the brightest aperture setting because that reduces my depth of field and can soften the edges of the frame, especially at wide focal lengths. With the DJI Air 2S your only choice of aperture is f/2.8. This also makes ND filters absolutely essential to control frame rates when shooting video.
One other thing I don’t like about the DJI Air 2S (and I’m really nitpicking here) is that the edges of the frame are not nearly as sharp as the center of the image, and this seems to be exacerbated by the fact that it is 22mm instead of 24mm. Objects at the edge of the frame are a little more distorted at 22mm than at 24mm.
Despite the aforementioned minor issues, overall the DJI Air 2S is great for a variety of purposes. It’s great for real estate, decent for landscapes, more than enough for hobbyists, and is a lot of fun. The reason I probably will be using the Mavic 3 for most landscapes is reduced noise, sharper frame edges, greater depth of field when stopping down to around f/5.6, and improved color rendition.
The basic Mavic 3 package is more than double the price of the DJI Air 2S. For that cost difference you get a little better image quality, an adjustable aperture, 50% more flight time, and slightly improved wind resistance. Due to the enormous difference in price the choice is certainly debatable, but if you’re serious about landscape photography and want more control over your photo & video settings the improvements might be worth the extra cost.
What’s Up with that Mavic 3 Telephoto Lens?
The gimbal on the Mavic 3 has two lenses and two sensors. The lower lens & sensor is the primary 24mm camera with the 4/3 sensor that produces JPEG & RAW images at 5280 × 3956. The upper camera is a 162mm fixed lens (7x optical zoom) with a 1/2-inch sensor that produces 4000 × 3000 images (RAW shooting only available if firmware is updated after May of 2022).
In order to use the telephoto camera you have to click the little binoculars icon on the right of the Go Fly app interface, which puts the camera into “Explore” mode. Once in explore mode you can click the “1x” button to see a variety of zoom levels all the way up to 28x.


One thing to be aware of is that most of the zoom levels are digital zoom, not optical. Both lenses on the Mavic 3 gimbal are prime lenses, not zoom lenses. Since there are two fixed focal length lenses, there’s really only two levels of detail you’re capturing. In “Explore” mode, 1x, 2x, and 4x are simply using a digitally zoomed (cropped) photo from the 24mm lens, and 7x, 14x, and 28x use the 162mm lens. To illustrate what this means, here are all the different zoom levels cropped into the yellow slide:


You can see a slight increase in detail going from “Explore Mode” 1x to 2x, but then 4x looks identical. I think there is an increase in detail going from 1x to 2x because at 1x it is using the 5280 × 3956 sensor to create a 4000 × 3000 image, which causes loss of detail (there’s less detail in 1x “Explore Mode” than in standard mode). The 7x, 14x, and 28x zoom levels all look pretty much identical.
If you’re not taking video, the only reason to use anything other than standard mode or 7x is If you want to use the different zoom levels to simply view your surroundings for fun (sort of like using flying binoculars). Many Mavic 3 pilots will find it fun to look around and zoom in on things in their vicinity from the air, and won’t be worrying about trying to print large photos with the lower resolution telephoto camera.
If you are creating a video, you can use the digital zoom functionality in Explore mode to add zoom effects to your video, but don’t expect to zoom in to 28x and capture super sharp details in your footage.
Mavic 3 Cine vs. Fly More Combo
Most of DJI’s recent drones offer “Fly More Combos” to purchase, which bundle the basic drone package with extra accessories like extra propellers, batteries, charging hubs, and other items at a slight discount to what you’d pay if you bought all the accessories separately. The basic drone package will get you flying, but if you buy the “Fly More Combos” you will be prepared for more frequent flights in a wider variety of situations. The Mavic 3 once again offers the “Fly More Combo,” but in addition you can instead buy the “Mavic 3 Premium Cine Combo.” You get the exact same aircraft whether you buy the base package or the “Fly More Combo,” but the “Mavic 3 Cine” is actually a special aircraft that includes 1TB of super fast internal storage and the capability to shoot videos in Apple ProRes 422 HQ.
Below are the different packages you can buy. For the “Fly More Combo” and the “Cine Premium Combo” I noted the difference between the combo and the standard package.
Mavic 3 Basic Package

The essential items included when you buy the basic Mavic 3 package.
Mavic 3 Fly More Combo

The items you get when you buy the Fly More Combo.
DJI Mavic 3 Cine Premium Combo

The items included with the Mavic 3 Cine Premium Combo.
DJI on Amazon.com
This page contains links to products, so if you find this site useful and use a link to make a purchase, I’ll get a small commission. As an Amazon Associate I earn from qualifying purchases. Thanks!


